- Customer changed internet provider/router.
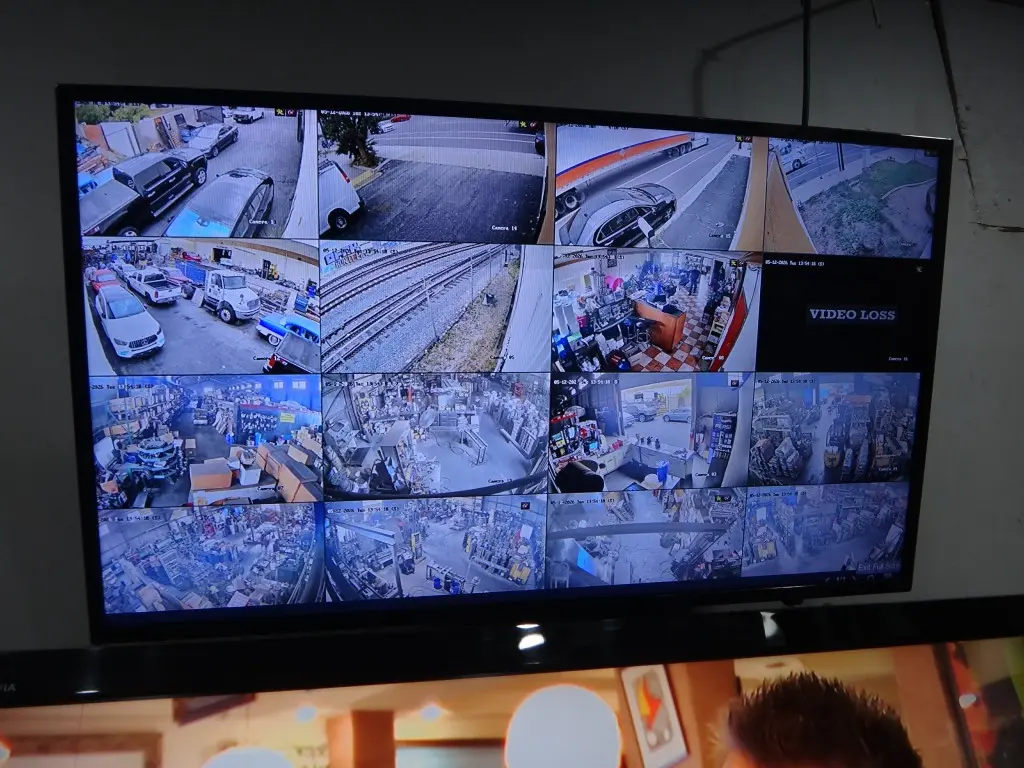
- Security cameras were recording normally locally.
- Remote viewing stopped working.
- NVR/DVR needed new network configuration.
- Reconnected system to mobile phones.
- Tested remote access Updated networking settings.
- Verified stable remote viewing
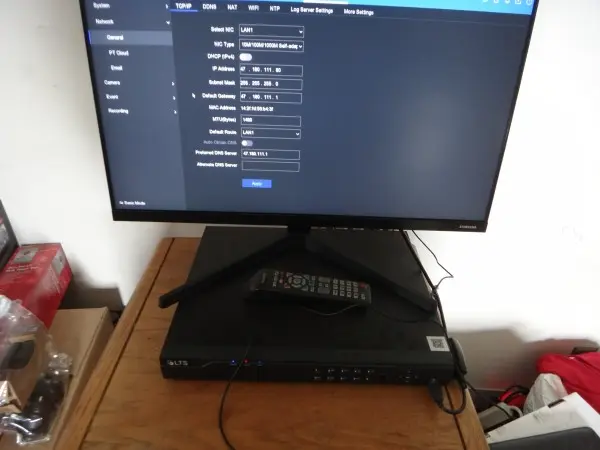
The first step when troubleshooting remote viewing problems is verifying that there is an active network cable connecting the DVR/NVR system directly to the internet router or network switch. Without a proper network connection, the security camera recorder cannot communicate with the internet, preventing mobile apps and remote access services from working correctly.
During inspections, the network cable is checked for physical damage, loose connections, disconnected ports, or incorrect wiring. Router ports and recorder network indicators are also verified to confirm data communication between devices. In some cases, internet provider changes, router replacements, or accidental cable disconnections can interrupt communication between the recorder and the network.
Once the wired network connection is confirmed, additional troubleshooting can continue with IP configuration, gateway settings, DNS communication, mobile application setup, and remote access verification. A stable physical network connection is essential for reliable remote viewing, smartphone notifications, and remote playback functionality.
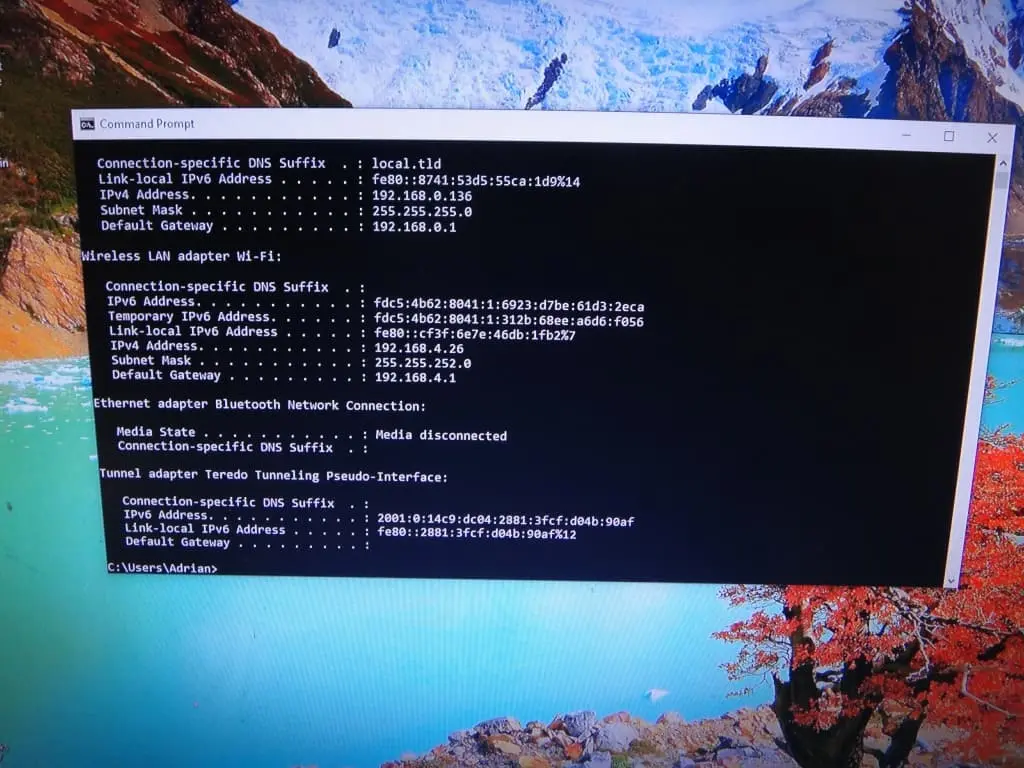
To troubleshoot remote viewing problems on a security camera system, one important step is checking the network information of the local internet connection using a computer connected to the same router. This helps identify the correct IP range, gateway address, and network configuration needed for the DVR or NVR system.
The process can be performed using the Windows Command Prompt utility:
- Connect a laptop or desktop computer to the same network as the security camera recorder using Wi-Fi or an Ethernet cable.
- Open the Windows Command Prompt by pressing the Windows key and typing “CMD” or “Command Prompt.”
- In the command window, type the following command:
ipconfig
- Press Enter to display the network configuration information.
The command will show important settings including:
- IPv4 Address
- Subnet Mask
- Default Gateway
- Network Adapter Information
The Default Gateway usually identifies the local router address, while the IPv4 Address helps confirm the active network range being used on the property. This information is important when configuring the DVR/NVR network settings manually or troubleshooting communication problems after internet provider or router changes.
Comparing the computer’s network settings with the recorder’s settings helps verify that both devices are operating on the same network and can properly communicate with the router. Once the network information is confirmed, remote viewing setup, mobile application access, and internet communication troubleshooting can continue more efficiently.
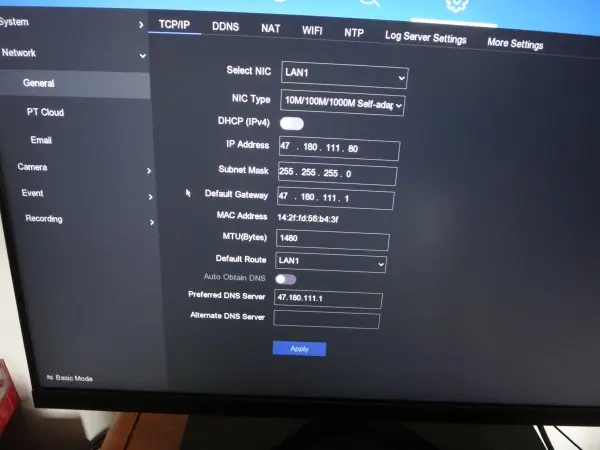
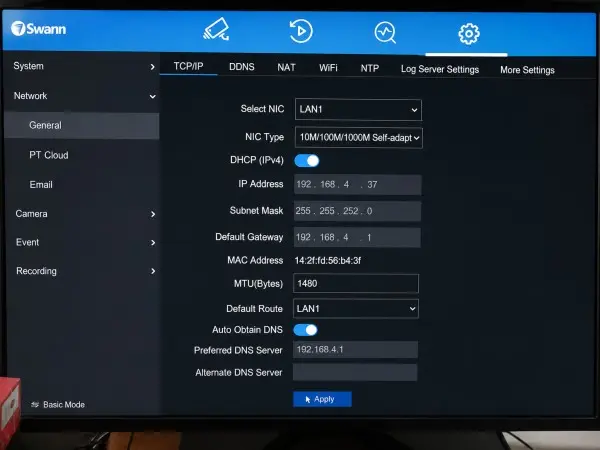
In many remote viewing repairs, enabling DHCP in the DVR or NVR network settings is one of the first and most important steps. DHCP allows the internet router to automatically assign the correct network settings to the security camera recorder, helping restore communication with the local network and internet connection.
After enabling DHCP, the recorder should automatically receive an IP address, subnet mask, and gateway from the router. The assigned IP address should be similar to the network range shown on the computer used for testing. For example, if the computer connected to the same router has an IP address such as 192.168.4.26, the DVR or NVR should normally receive a similar address like 192.168.4.37.
The recorder and computer must remain on the same network range to communicate correctly with the router and remote viewing services. However, both devices cannot use the exact same IP address because duplicate IP addresses can create communication conflicts and prevent proper network operation.
Once DHCP is enabled and the recorder receives a valid network address, additional testing can continue for mobile app connection, internet communication, remote playback, and smartphone notifications.
After enabling DHCP on the DVR or NVR network settings and pressing Apply, the recorder should automatically receive valid network information from the internet router. If the network settings do not update or the recorder does not obtain a valid IP address, the physical network connection should be checked again carefully.
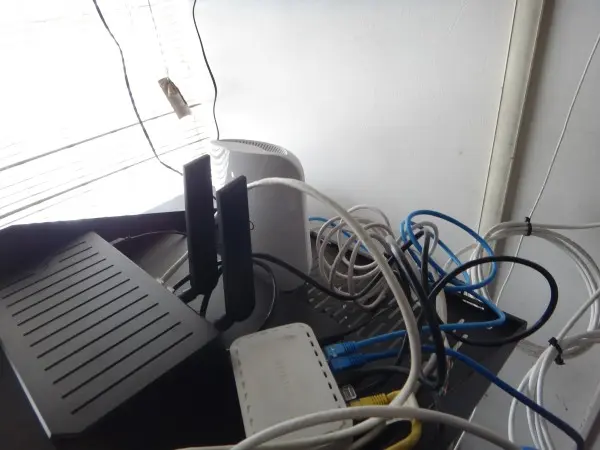
Verify that the Ethernet network cable is firmly connected to the DVR/NVR network port and that the other end of the cable is connected either directly to the internet router or to a network switch that is properly connected to the router. Network switches are commonly used in commercial properties and larger installations to expand the number of available network ports.
It is also important to check for loose cables, damaged connectors, disconnected switches, or inactive router ports that may interrupt communication between the recorder and the network. In some cases, internet provider equipment changes or accidental disconnections may prevent the recorder from communicating with the router.
After confirming the physical network connection, restarting or rebooting the DVR/NVR system is recommended. A system restart allows the recorder to request a new IP address from the router and refresh the network communication process. Once the recorder powers back on, the network settings can be checked again to verify that a valid IP address, subnet mask, and gateway have been assigned correctly.
We also provide security camera networking and remote viewing support for businesses and homeowners in Norwalk and La Mirada