1. Plan the System
Identify Coverage Areas: Decide where you want cameras installed. Focus on entry points, driveways, and blind spots.

Select Camera Types: see the next section.
Understand Camera Types
Bullet Cameras:
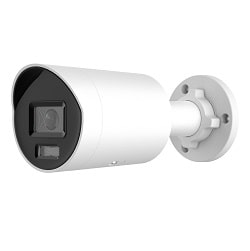
Appearance: Cylindrical and typically wall-mounted.
Best For: Monitoring long distances (e.g., driveways, backyards).
Pros: Easy to install, good for focused areas.
Cons: More visible and prone to tampering.
Dome Cameras:
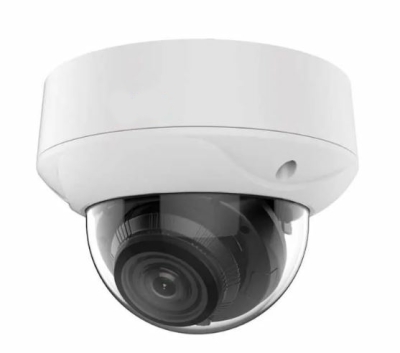
Appearance: Dome-shaped and ceiling-mounted.
Best For: Indoor spaces and wide coverage areas.
Pros: Discreet, resistant to tampering, wide viewing angle.
Cons: Limited range compared to bullet cameras.
PTZ Cameras (Pan-Tilt-Zoom):

Capabilities: Can rotate (pan), tilt, and zoom.
Best For: Large areas requiring live monitoring (e.g., front yards).
Pros: Flexible viewing, remote control.
Cons: Higher cost and requires manual adjustment or automation.
Turret Cameras:
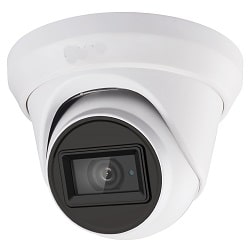
Appearance: Compact, ball-and-socket design.
Best For: Areas needing a robust, vandal-resistant option.
Pros: Durable, adjustable angles, less intrusive.
Cons: Requires careful positioning.
Determine Desired Features
Resolution:
Go for 2 megapixels(1080p (HD), 4 megapixels, or 8 megapixels (4K) for clearer images.
Field of View:
Wider lenses cover more area but may sacrifice detail.
Narrow lenses focus on specific areas.
Motion Detection:
Useful for alerting you of activity in the camera’s field of view.
Audio:
Choose cameras with two-way audio for communication and additional security. This camera is usual
Connectivity Options
Wired Cameras:
Require a direct connection to power and DVR/NVR.
Offer consistent performance with no interference.
Wireless Cameras:
Use Wi-Fi or Bluetooth.
Easier installation but may suffer from connectivity issues.
Use batteries, or power adapter.
Power Source:
PoE (Power over Ethernet): One cable for power and data.

Separate Power Supply: Requires additional cabling.
Match Cameras to Specific Areas
Front Door:
Use a doorbell camera or wide-angle bullet camera.
Backyard/Garage:
Choose cameras with motion detection and night vision.
Indoor Monitoring:
Dome or turret cameras for discreet and broad coverage.
Set a Budget
Balance between features and cost.
Consider long-term expenses like storage and maintenance.c
Cameras based on your needs.
Determine Number of Cameras: Ensure your security system supports the required number of cameras.
Choose a DVR/NVR: A Digital Video Recorder (DVR) or Network Video Recorder (NVR) will store and manage footage.
DVR (Digital Video Recorder):
Processes video on the recorder itself.
Receives analog video signals from cameras and converts them into digital format for storage.
Use Siamese Camera wire and Power supply.
NVR (Network Video Recorder):
Processes video at the camera level (IP cameras).
Receives already digitized and compressed video data from network cameras.
Provides power to the cameras (PoE).
Uses Cat6 or Cat5e cable.
2. Gather Tools and Materials
Tools: Drill, screwdriver, ladder, fish tape, cable clips, and crimping tool.
Materials: Cameras, DVR/NVR, cables (typically Siamese, Cat5e/Cat6 or coaxial), power supply (DVR system), mounting brackets, and screws.
3. Prepare the Installation
Position Cameras: Place cameras at strategic points. Ensure they’re at least 8-10 feet off the ground to prevent tampering.
Test Cameras: Connect cameras to the DVR and power supply temporarily to test functionality before permanent installation.
4. Install Cameras
Mount the Cameras:
Drill holes for the mounting brackets.
Attach the brackets to the wall/ceiling.
Secure the camera to the bracket.
Run the Cables:
For Siamese cables: Use BNC connectors and power connectors.
For Cat5e/Cat6: Use RJ45 connectors.
Route cables through walls, attics, or conduits to hide them and protect them from damage.
Prepare the terminations of wires.
For NVR system- Install Cat6 connector on cat 6 wires (two connectors, one NVR side, and the other camera side)
For DVR system- uses Siamese camera wire (coaxial and pair for power). Install 2 BNC connectors one on DVR side and the other for the camera. Install power connector on the camera side, attach the other side of the wire to the power supply.
5. Connect the System
Attach Cameras to DVR/NVR:
Connect each camera cable to its corresponding port on the DVR/NVR.
Connect the DVR/NVR to a Monitor:
Use HDMI or VGA cables to connect the DVR or NVR to a monitor for viewing.
Power Up the System:
Plug the cameras and DVR into a power source.
Use a UPS (Uninterruptible Power Supply) to protect against power outages.
6. Configure the System
Set Up DVR/NVR:
Configure settings such as recording schedules, motion detection, and resolution.
Assign unique names to each camera for easier identification.
Connect to the Internet (if applicable): For remote access, connect the DVR/NVR to your router and set up remote viewing through an app or browser.
7. Test the System
Verify camera angles, video quality, and night vision capabilities.
Check remote viewing functionality, (install the app on your phone or computer)
Adjust camera positions as needed.